So as you may have noticed I have an affinity for painting watercolors on panels. The panels I use for watercolors are called Aquabord from Ampersand Art. I like the panels for a few reasons.
- They are resilient to the fact that I can be heavy handed in the beginning stages of a painting. This probably stems from the fact that my background and formal training circled around oil painting.
- They allow me to go back and fix mistakes in a similar way that an oil painting does. Maybe paper does this as well, but I just haven’t worked with it as much when it comes to painting.
- I don’t have to use tape. I am a nature lover and a tree hugger so anyway I can eliminate the use of plastics and tapes while making art is fine by me. The only thing I wish was different is each of the panels comes wrapped in plastic. I would love to see the option to order them in a bulk set wrapped in paper or cardboard.

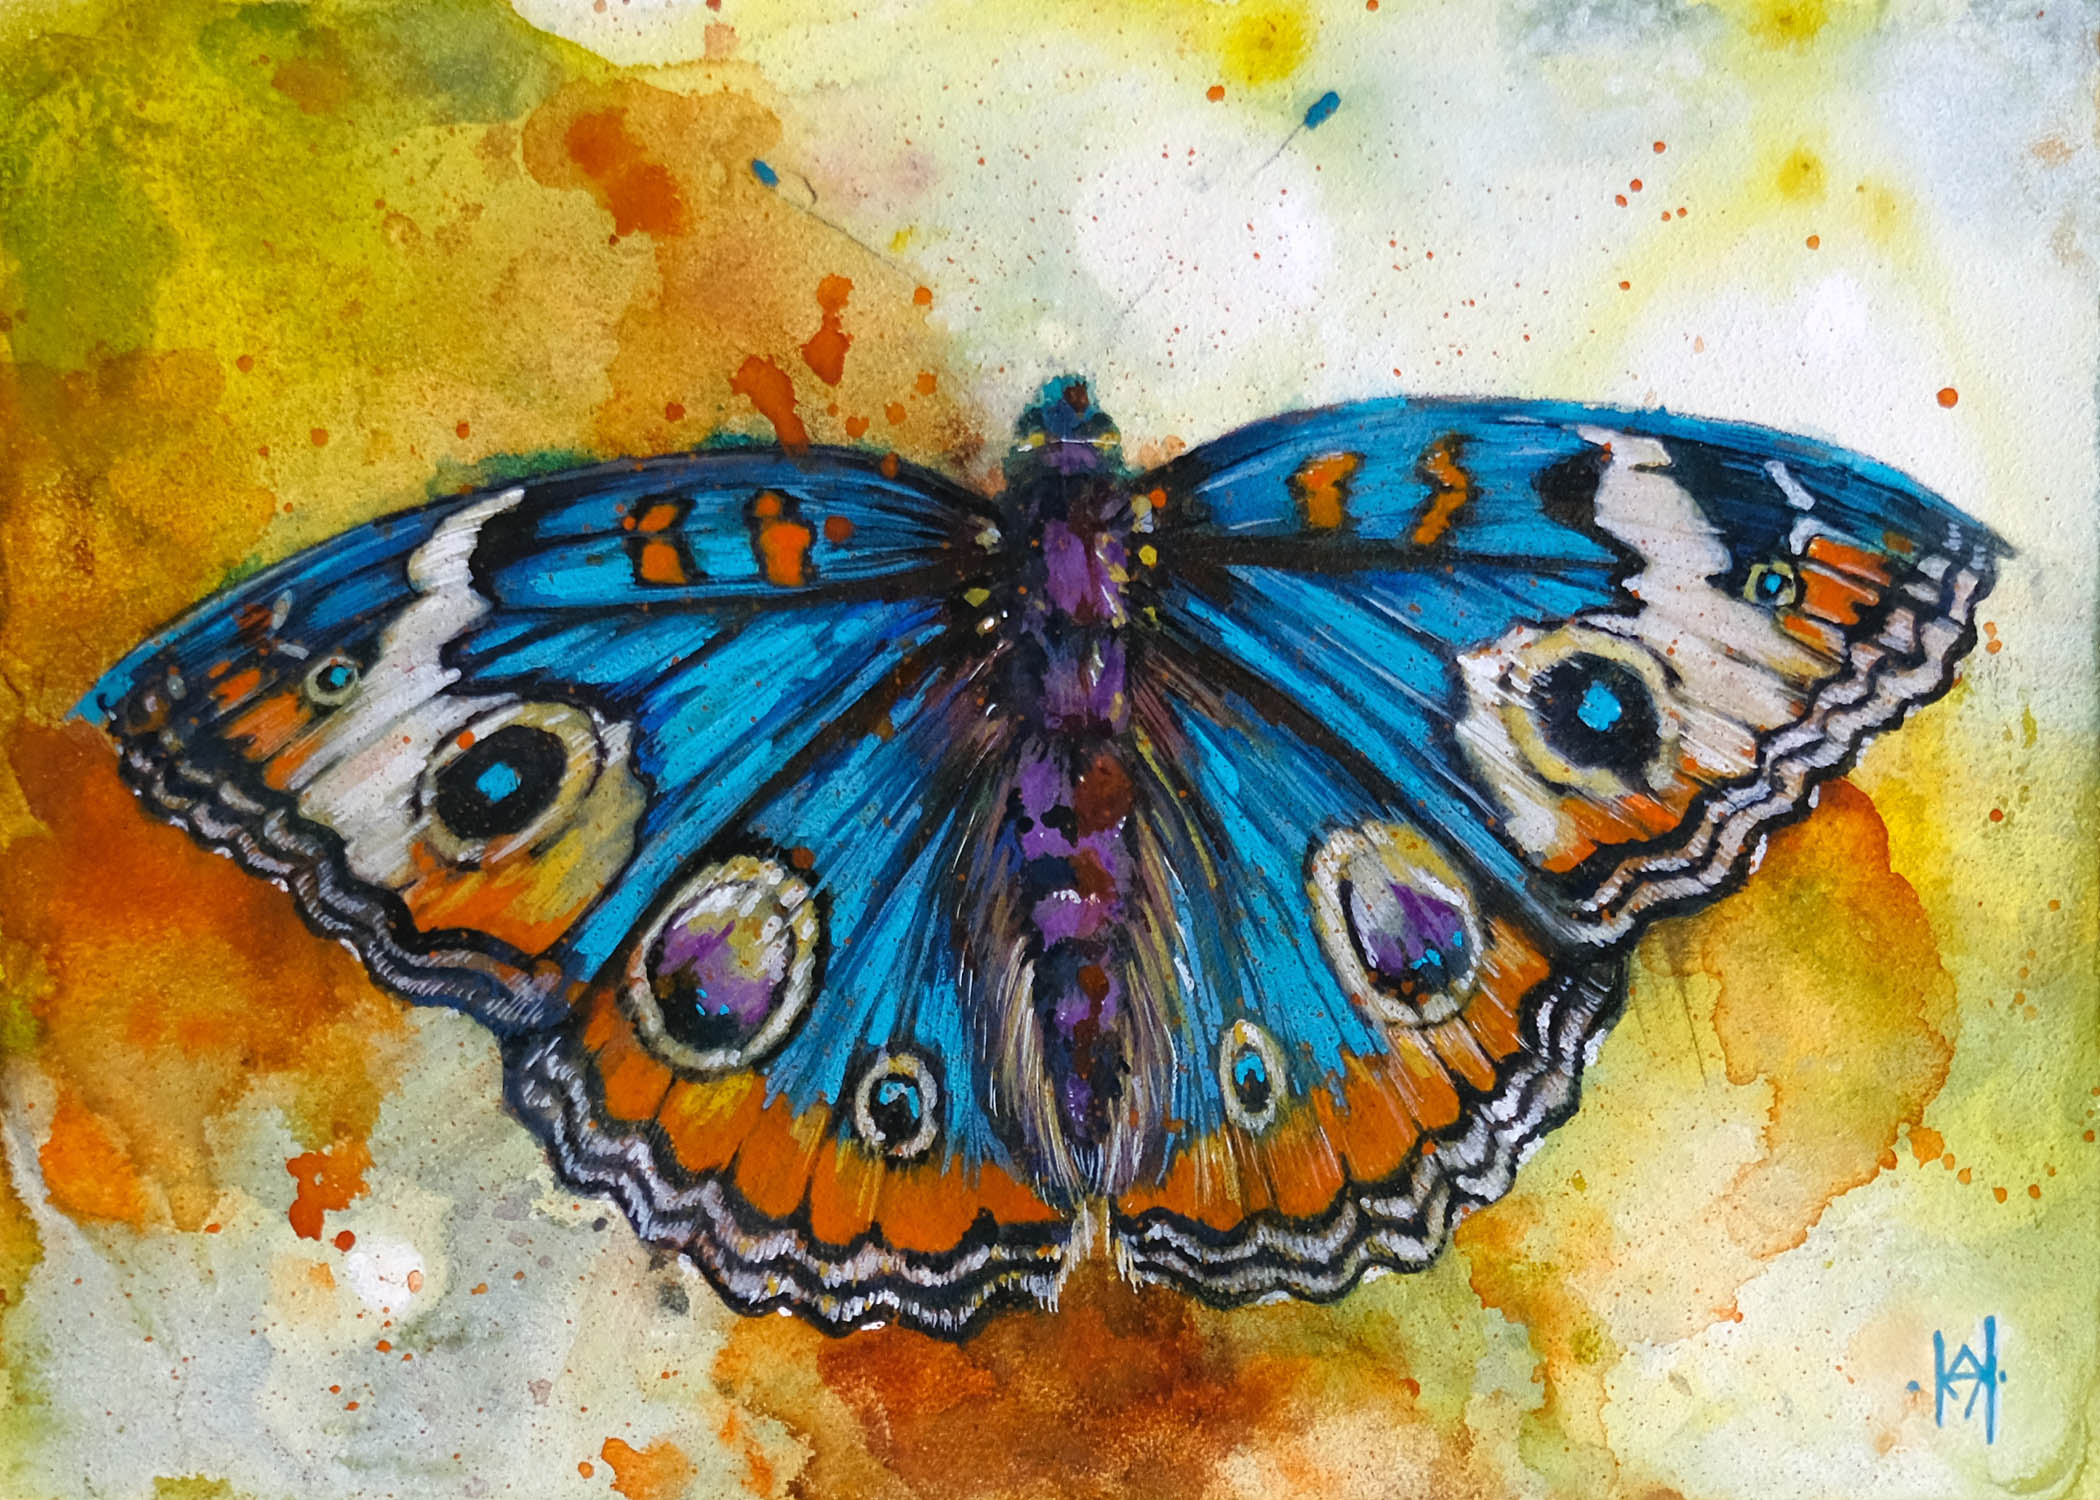
The Piece above is now available on my store -> Blue Buckeye Butterfly
So back to the process!
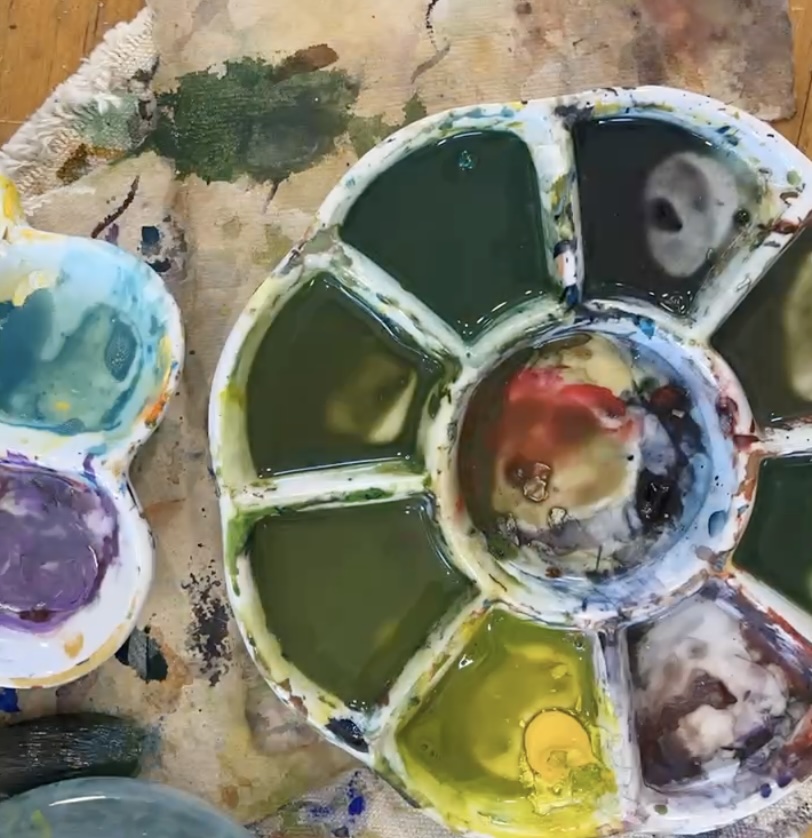
Step 1 – Prepare the colors you want to work with to make the ground.
The step pretty much tells you what you are doing here… prepare several colors in your palate at the loose viscosity that you need to make a washy background.
Step 2 – Lay down the Ground or base painting.
This part is important, and it’s unfortunate that many people don’t use this painting tool. A ground, underpaintings, or base painting helps set you up for color contrast and cohesion. An underlying color can help with your composition feeling cohesive. It can provide contrast an vibrance to the colors you want to use (basically you are using color theory to help your painting come to life) We all have the colors we like to use in an underpainting and sometimes that underpainting will help you recognize an artist without you even understanding why.
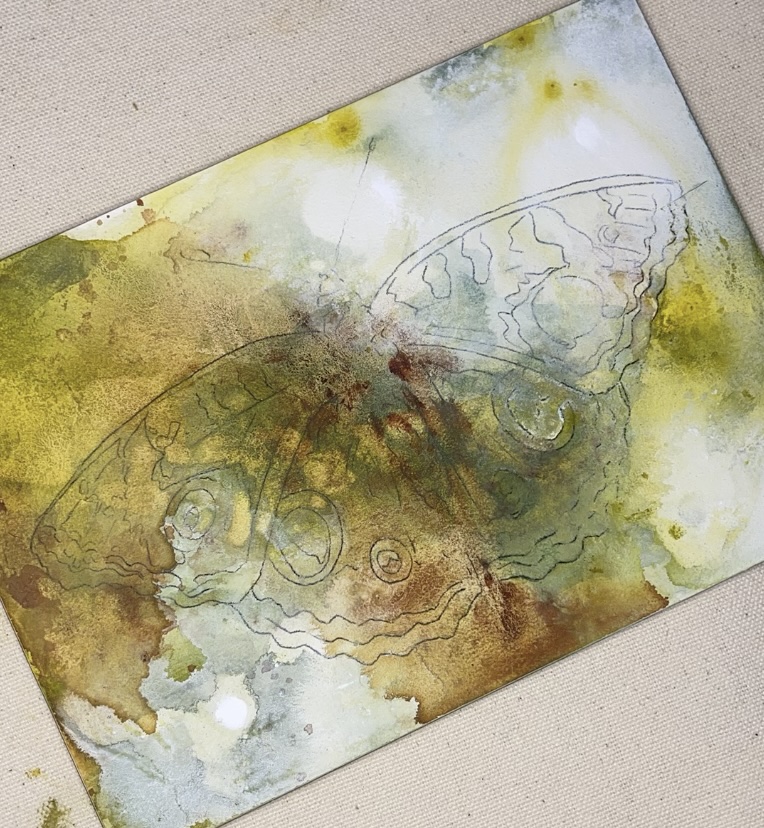
Step 3 – Develop some visual texture.
This is the money maker for me. It is also sometimes why photographs don’t always do my paintings justice, as well as I have been told on many occasions “you need to just see them in person”. Visual texture for me makes things feel real. Nothing in life stays still for long, especially wildlife. So, to make them feel real visual textures helps to feel the fleeting moment that has been captured. It also, on a simple level, makes it visually more interesting. Something with many imperfections can feel in a way perfect.
Tools I rely on heavily to make texture include: Salt, alcohol, and drips of watercolor. I have other means, but I can let all of my secrets out of the bag….

Step 4 – Let’s make the beautiful image you have in mind.
Now that you have built up the base it’s time to paint the central focus in your painting, whatever that may be, whether it is representational or not. You used your ground to develop a color contrast. You’ve used layering to create texture. Now paint away in whatever way floats your boat.
Thanks for joining me on this watercolor journey. Let me know if you have any questions in the comments below as I would love to help you on your art journey!